User Tools
Sidebar
Table of Contents
The Janome 2000 CPX
What's different for hemming?
Much of the information about hemming with the Babylock CoverStitch also applies to the Janome. For good results I suggest checking out this first.
Here I would like to share some of the differences I have noticed between the two brands. I notice that I tend to use the same differential settings but a slightly longer stitch length on the Janome (on average 3 and a bit on the Janome versus 2.75 on the Babylock. I also notice that the Janome performs better when stitching slowly and it is easy to go slowly. Both machines have exactly the same model foot controller but for some reason the one on the Babylock is hard to keep from racing and the Janome one allows for sewing at a gentle pace.
And then there are skipped stitches or rather how to avoid them. The Janome Cover Pro is a bit more prone (I am choosing my words carefully ![]() ) to 'create' skipped stitches. Let's tame them?
) to 'create' skipped stitches. Let's tame them?
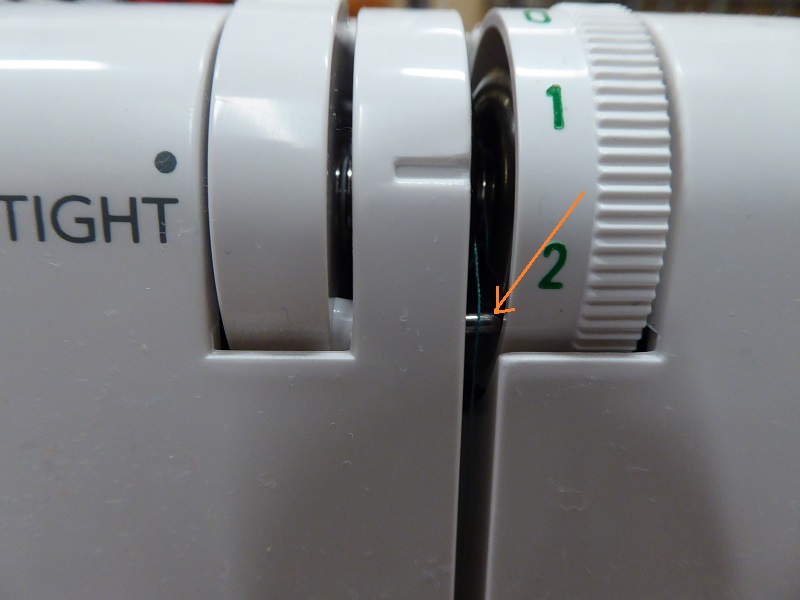
In the following 2 images you can see the difference between the tight and soft setting. The first one shows the SOFT setting with a little metal bar (see orange arrow) moving forward and lifting the the looper thread forward and out of the tension discs.
The next image shows the TIGHT setting, the little bar moves away and the looper thread sits?/lies? between the tension discs.
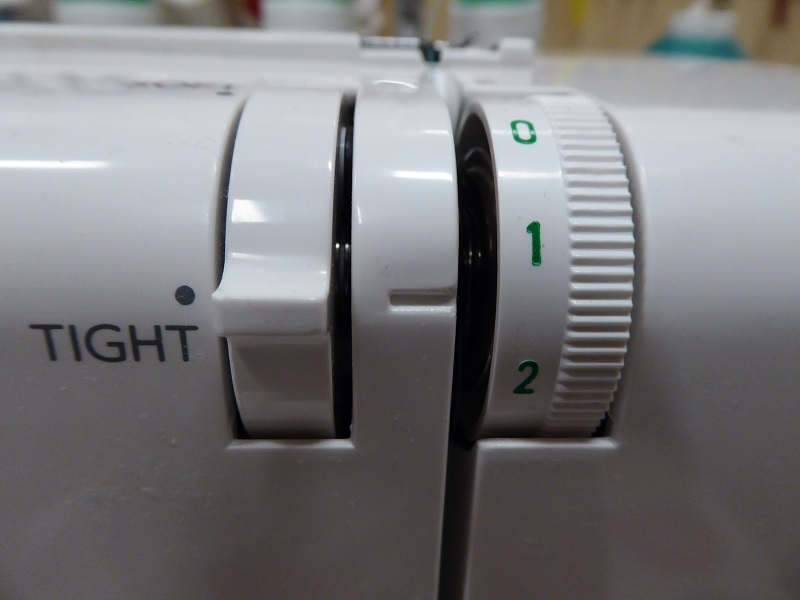
The manual recommends switching to TIGHT when skipped stitches are occurring. Generally speaking the TIGHT setting seems best with heavier fabrics and multiple layers. The SOFT setting seems better suited to lightweight fabrics, to avoid tunnelling when hemming with the left needle piercing only one layer of fabric and when using polyester or woolly nylon stretch thread in the looper.
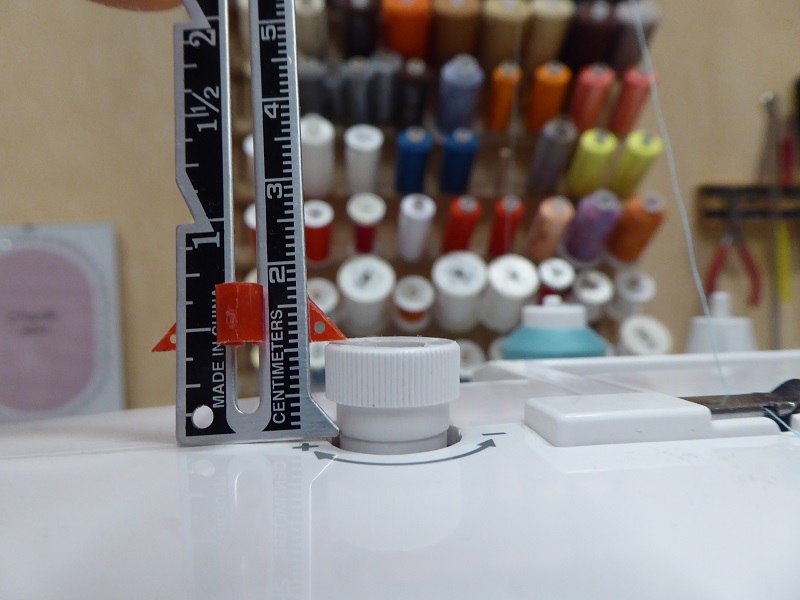
Unless stated otherwise, my presser foot knob is set at 10.5 millimetres or 13/32“ above the machine.
Hemming average cotton lycra/elastane knits
Here is a sample of 2 hems on a cotton elastane knit. The bottom hem in the following image is sewn with all purpose polyester sewing thread in the needles and the looper.
SETTINGS for the Janome Cover Pro with this particular combination of threads and fabric:
Needles 3
Looper 1.5
Setting SOFT
Stitch length 3 and a bit
Differential 1.3
The top hem is sewn with woolly nylon in the looper:
SETTINGS for the Janome Cover Pro
Needles L2 R3
Looper 0
Setting SOFT
Stitch length 3 and a bit
Differential 1.3
Tunnelling when the left needle pierces 1 layer of fabric
When hemming with the left needle just piercing one layer of fabric, I use the SOFT setting to reduce the tension on the looper.
I have noticed that when I use the same tension for all needles, most hem samples with either polyester stretch thread or woolly nylon turn out feeling rather taut when stretched across the grain and they also tend to tunnel to some degree. Woolly nylon tends to cause more tunnelling than polyester stretch thread. But both stretch threads also help with avoiding skipped stitches and since I have invested in quite a lot of cones of stretch thread, I intend to use them.
Lowering the tension on the left needle thread by about 1 point compared to the setting for the right and/or middle needle seems to result in a much more balanced stitch and a stretchy hem.
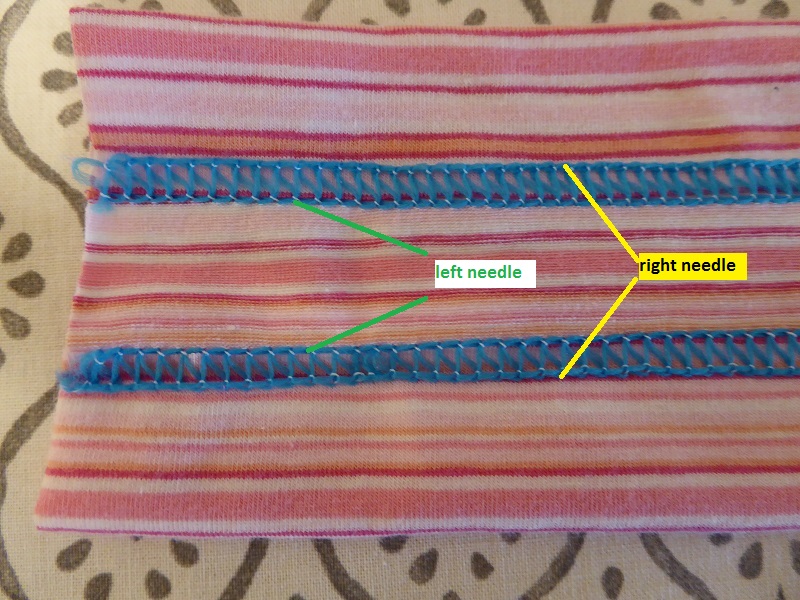
The reason for this may be something like this: one layer of fabric offers less resistance to the needle thread and it gets pulled up higher as the needle moves up again. The result is that the left needle thread leaves a smaller loop (see illustration left) than the right needle thread which has to move through 2 layers. When stretched across the grain this may cause discomfort f.ex. when pulling up a sleeve. When I add a stretch thread in the looper to this challenge, the thread will relax to its original length after the stitch has formed. This causes a taut hem with varying degrees of tunnelling depending on the weight of the fabric. The needle thread tensions on the following illustration worked well for a particular fabric/thread combination but please, do not take these settings as absolute values! Different thread types and brands may perform better with different settings. Please feel free to experiment.
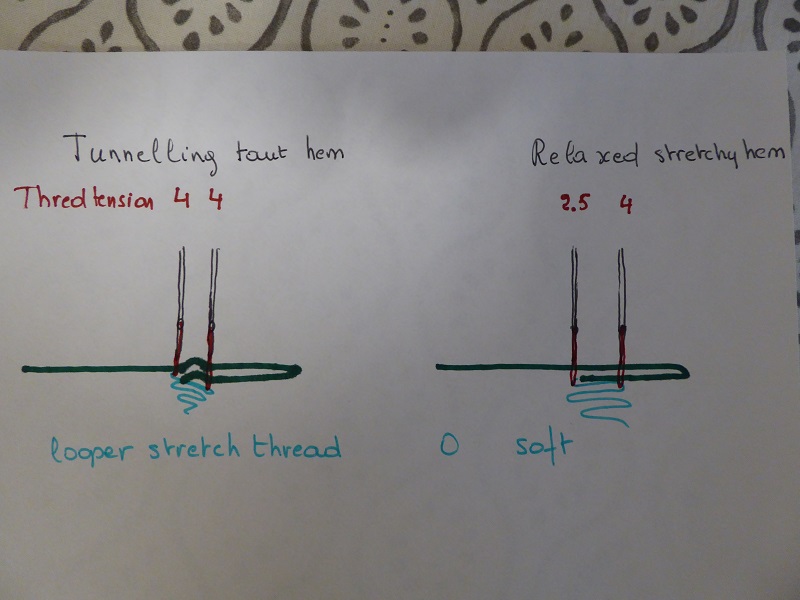
Here are different settings for two hems on a light weight fabric and the top one turned out more balanced and stretchy. I notice the right needle thread on the bottom hem leaving bigger loops on the wrong side when the settings for the needles are equal. But the top hem shows a balanced stitch and it feels very comfy when stretched.
SETTINGS for the top hem:
Needles left 1 right 2
Looper 0
Setting SOFT
Stitch length 3 and a bit
Differential 1.3
SETTINGS for the bottom hem:
Needles left 1.5 right 1.5
Looper 0
Setting SOFT
Stitch length 3 and a bit
Differential 1.3
Reverse coverstitching hems
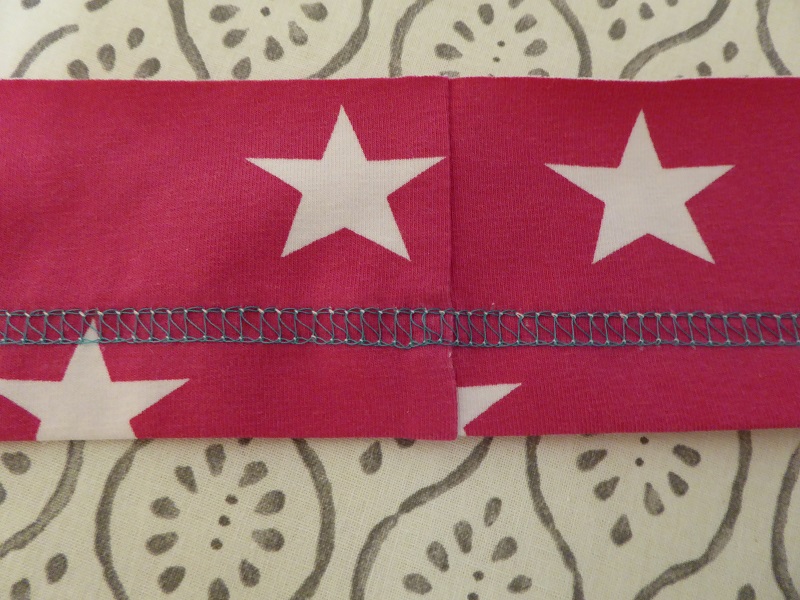
You may want to check out more about preparing for reverse stitching hems here first. When I reverse stitch a hem, both needles go through the same number of layers and for the next sample I used these
SETTINGS for the Janome Cover Pro:
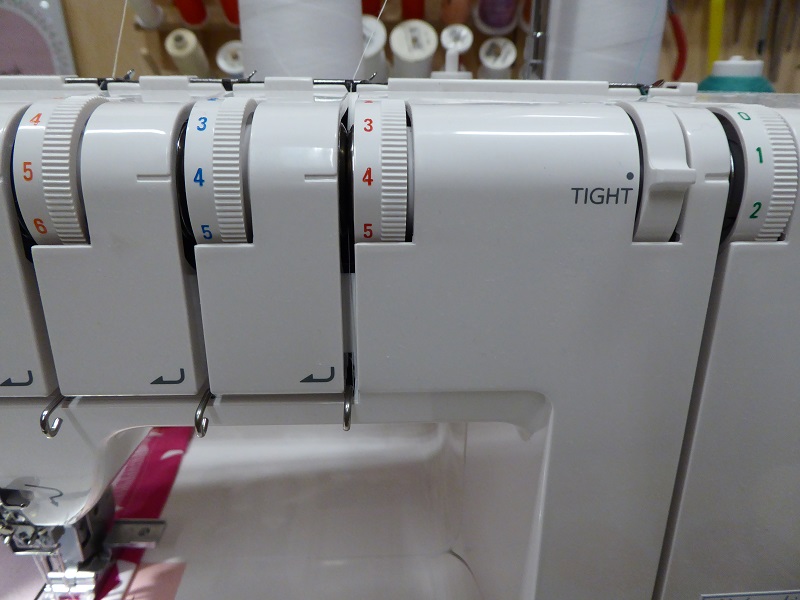
Needles left 5 right 4
Looper 1.5
TIGHT
Stitch length 3 and a bit
Differential 1.3
Getting over those humps
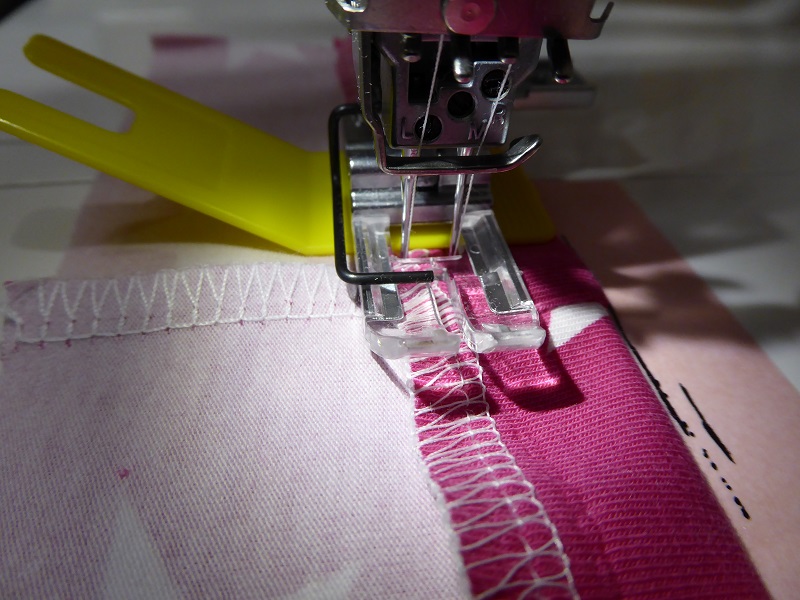
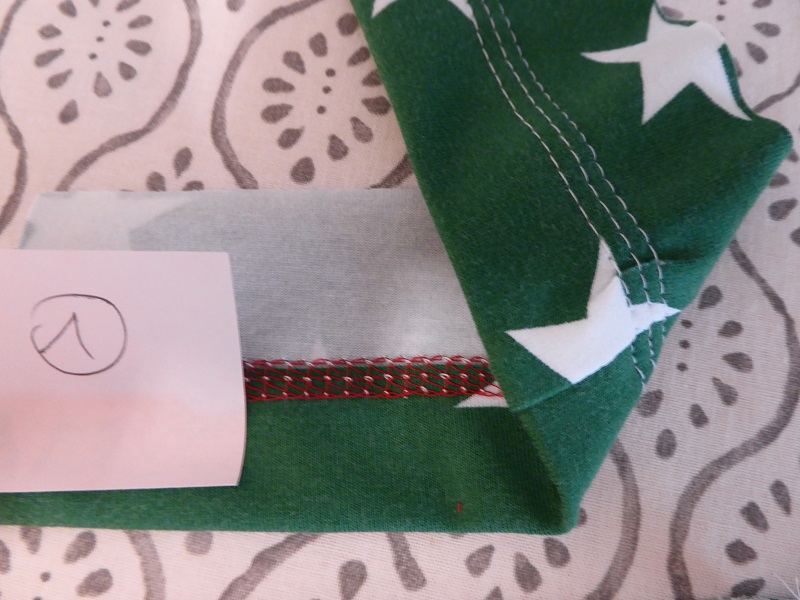
It may be useful to help the presser foot move over those little humps at the side seam f.ex. Sometimes a hump will be sewn beautifully by just going slowly but other times there may be a movement resulting in unsightly pleats or skipped stitches. When using a hump jumper, I stop sewing with the needles down, lift the presser foot and place the hump jumper behind the needles. It is also possible to use a piece of folded fabric to do the job. Here I am not using the hump jumper the way it is supposed to be used because I prefer to slide it behind the needles from the side as seen in the following image.
And this is what may happen without the hump jumper:
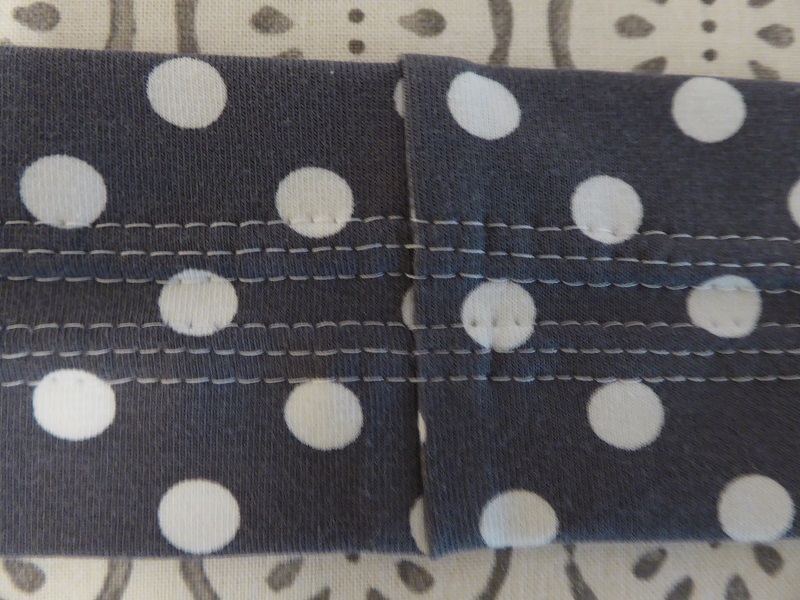
Another way of easing the presser foot over the hump is to reduce it by snipping the side seam like this.
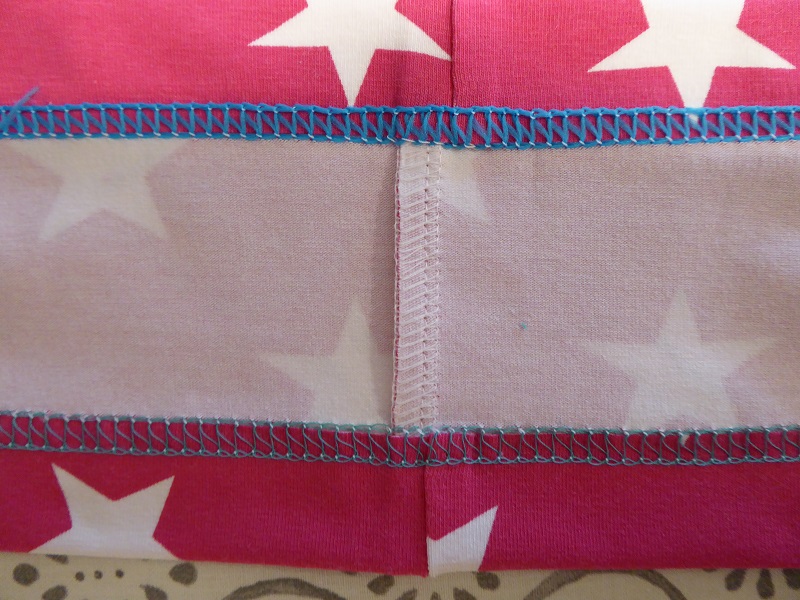
The following image shows the right side of two hems with the top one not snipped and the bottom one snipped and how the result is even more pleasing to the neatnik eye!
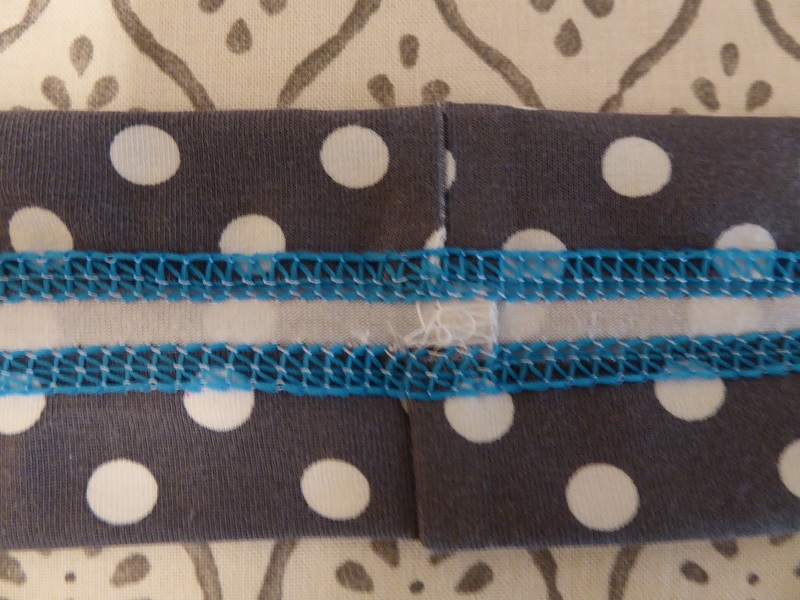
And here is what that looks like from he wrong side; top one snipped versus bottom hem not snipped.
To be honest, I have been sewing my hems on my Babylock Coverstitch for years without much snipping and I seldom worry about perfectly wrapping the edge of the hem. So far I have avoided testing settings for the needles by stitching a few millimeters away from the edge like this. But it is always nice to have options. Or is it? As they say in French: “l'embarras du choix!” I am now facing the burden of choice. ![]()
If you have questions, suggestions or need help with choosing, please join us at https://www.facebook.com/groups/Hilde.Coverstitch/

